Bookshelf styling is one of those things that looks effortless in magazines and impossible in real life. You stand in front of yours – a mess of paperbacks, kids’ school photos, and that ceramic bowl your aunt gave you – and have no idea where to start.
Most bookshelves fail for the same three reasons. First, too many books lined up like a library shelf. Second, objects placed randomly with no rhyme or reason. Or the opposite – a stiff, overdesigned setup that looks like it belongs in a hotel lobby, not a home.
So this guide gives you a beginner-friendly bookshelf styling framework you can actually use. No fancy tools, no shopping trip, no designer required. You’ll learn the 3-zone method professionals use, 10 simple ideas that work with what you already own, and the “squint test” that tells you in 5 seconds whether your shelf is done. Pick two or three ideas, spend 30 minutes, and by the time you sit back down your bookshelf will look intentional instead of accidental.
Why Bookshelf Styling Is Harder Than It Looks
A bookshelf isn’t just storage. It’s the room’s biggest piece of visible personality – usually 20+ square feet of vertical real estate that pulls the eye whether you want it to or not.
That’s exactly why it feels overwhelming. Every shelf is a mini-composition. Get it wrong and it screams “cluttered.” But get it too right and it screams “showroom.” The sweet spot is a personal, lived-in look that still feels curated.
Bookshelf styling breaks down for three predictable reasons:
• Too much stuff in too little space – a shelf full to the edges reads as clutter
• Everything at the same height – flat lineups have no rhythm
• No breathing room – negative space is what makes styled shelves look styled
Fix those three and you’re already 80% of the way there.
The 3-Zone Method for Bookshelf Styling (Beginner’s Framework)
The easiest way to style a bookshelf as a non-designer is to divide it into three zones and give each one a job.
• Zone 1: Books – takes up ~50% of the shelf
• Zone 2: Objects – takes up ~30% (vases, bowls, small sculptures, framed photos)
• Zone 3: Negative space – takes up ~20% (visible gaps and empty shelf portions)
Once you commit to the ratio, everything else becomes easier. You stop asking “what goes here?” and start asking “which zone am I filling?”
Then distribute the zones diagonally across the shelf – books top-left, objects middle, negative space bottom-right (or any other diagonal). Diagonals feel dynamic, while perfect rows feel stiff.
10 Bookshelf Styling Ideas Anyone Can Copy
Every idea below uses what you probably already own. Pick 3-4 that fit your shelf and try them this weekend.
1. Take Everything Off First (Yes, Really)
The biggest bookshelf styling mistake is trying to rearrange what’s already there. You can’t see the forest for the trees.
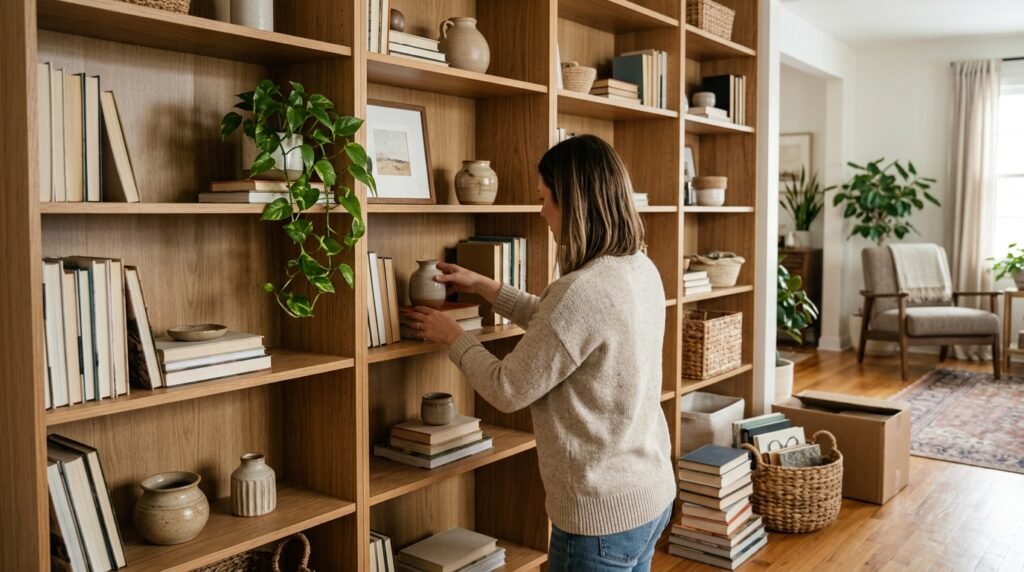
Empty every shelf onto the floor or a bed. Sort into three piles: keep, donate, store elsewhere. You’ll almost always end up with a lot less than you started with – that’s the point.
2. Group Books Horizontally AND Vertically
Rows of vertical books look like a library. Rows of horizontal books look like a coffee shop. Mix them.
A good ratio: 2/3 vertical stacks, 1/3 horizontal. In fact, the horizontal stacks double as pedestals – put a small object on top for instant height variance.
3. Use the “One Third” Rule for Books
Don’t fill every shelf with books. Reserve about one third of your bookshelf for non-book items – objects, negative space, art.
More books than that = library. Fewer than that = trying too hard. One third, therefore, strikes the balance most bookshelves need.
4. Add Objects Between the Books
The trick that separates styled shelves from storage shelves: place objects between and among the books, not just on top.
A small brass figure between two vertical stacks. A ceramic bowl leaning against a horizontal stack. A candle holder tucked in the corner. Together, these small additions break up the “wall of books” effect.
5. Sneak in a Personal Photo (Just One or Two)
Framed photos add warmth. But too many photos turn a bookshelf into a memory board, which reads as busy.
So cap it at one photo per shelf, maximum two per bookshelf. Choose ones with visually strong frames – black, brass, or natural wood beats fussy or ornate.
6. Layer in Something Green
A single plant or dried stem does more for a bookshelf than three new objects combined. It adds the one thing books can’t: life.
For example, trailing plants (pothos, ivy) work best on upper shelves so they cascade downward. Small potted plants and dried florals work anywhere.
7. Vary the Depth With Layered Frames
Standing objects at different depths – one at the back, one halfway forward, one right at the edge – adds dimension.
The easiest way: lean art or a framed print against the back of the shelf, then place a smaller object in front of it. Instant depth, zero effort.
8. Use Baskets to Hide Ugly Necessities
Cords, chargers, kids’ toys, spare batteries – everything ugly a bookshelf ends up hiding – goes in a basket. Woven, canvas, or wire baskets all work.
The basket becomes part of the styling, not a compromise. Bottom shelves are the natural home for them.
9. Leave Every Third Shelf Slightly Empty
Not every shelf needs to be full. Leave one shelf (usually a middle one) intentionally minimal – maybe just a plant and one book laid flat.
This “breathing shelf” is what makes the whole unit feel designer instead of stuffed.
10. The Squint Test (Do This Last)
Step back 6 feet from the shelf and squint. If your eye lands on one or two focal points, you’re done. If everything blurs into one busy mass, remove 2 or 3 items and try again.
Designers do this constantly, but beginners rarely do. It’s the fastest quality check ever invented.
Bookshelf Styling Data and Common Mistakes in 2026
Some numbers worth knowing before you start rearranging:
• Average time to fully style a bookshelf: 30-60 minutes for a 5-shelf unit
• Ideal ratio of books to objects to negative space: roughly 50 / 30 / 20
• Most common bookshelf styling mistake: overfilling every shelf (60%+ of home bookshelves fall here)
• Second most common mistake: all books lined up vertically with nothing else
• Percentage of designer bookshelves that use both horizontal and vertical book stacks: ~85%
• Ideal number of framed photos per bookshelf: 1-2 (any more looks cluttered)
• Percentage of Pinterest bookshelf pins that feature a live plant: ~68%
• Percentage that feature a woven basket: ~40%
• Minimum height difference between adjacent objects for good visual rhythm: ~2 inches
• Ideal number of colors on a styled bookshelf: 3-4 (any more feels random)
Finally, ignore any bookshelf inspiration that doesn’t include books turned horizontally, at least one plant or object between them, and visible empty space. Those three markers cover almost every well-styled shelf online.
Bookshelf Styling Comparison: Cluttered vs Styled vs Overdesigned
| Feature | Cluttered Shelf | Well-Styled Shelf | Overdesigned Shelf |
| Books | Every shelf packed | ~50% of shelf, mixed orientations | Books used as props only |
| Objects | Random, uncoordinated | 30% of space, 3-4 colors max | Everything perfectly matched |
| Personal touches | Too many photos, memorabilia | 1-2 photos, personal but curated | None – feels impersonal |
| Negative space | None | ~20% visible gaps | Excess (looks empty) |
| Overall feel | Chaotic | Lived-in and intentional | Staged, hotel-lobby |
| Time to achieve | 0 minutes (default) | 30-60 minutes | Hours + shopping trip |
| Cost | Free | $0-$50 with items you own | $200+ new objects |
The middle column is what you’re aiming for. Neither extreme wins.
Pro Tips for Bookshelf Styling Without a Designer
A few habits that separate okay from great:
Start with the anchor shelf. Pick the shelf at eye level – usually the middle one. Style it first because it’s what visitors see first. Everything else builds around it.
Odd numbers beat even. Group objects in 3s or 5s. Even numbers look symmetric and forced, whereas odd numbers look natural.
Books belong on the top shelf too. Beginners often reserve the top shelf for just objects. But books add visual weight – a shelf without any looks incomplete. Add at least a small horizontal stack up top.
Match one color across the whole unit. Pick one color (a brass, a warm wood, a specific green) and repeat it 3-5 times across different shelves. This is what makes a bookshelf feel like one composition instead of five separate ones.
Photograph in landscape mode. A phone photo reveals what your eye misses. If the photo looks busy, remove one item per shelf and re-shoot.
For more low-effort, high-impact decor moves that pair with bookshelf styling, see our full guide to making your home look expensive with simple decor tricks (https://localhomeimprove.com/make-home-look-expensive/).
FAQ About Bookshelf Styling
How do I style a bookshelf if I don’t have many books?
Fill the space with objects, framed art, plants, and baskets instead. Aim for the same 50/30/20 ratio but treat the “book” zone as a “book + book-like object” zone – sculptural pieces, small trays, and boxes all count. You never need a full library to have a styled shelf.
Should I organize books by color or by subject?
For pure aesthetics, by color. For practical use, by subject. A middle path works well: group by color within loose subject sections. You get visual harmony without losing the ability to actually find a book.
How many objects should be on each shelf?
3 to 5 items per shelf is the sweet spot. Fewer looks empty. More looks cluttered. Include one book element (vertical or horizontal stack) plus 2-4 objects, and you’re inside the range.
What’s the difference between styling and decorating a bookshelf?
Decorating is what you put on the shelf. Styling is how you arrange it. Two shelves with identical items can look completely different depending on placement, height variation, and use of negative space.
Do I need to buy new stuff to style my bookshelf?
Almost never. Most beginners have plenty of raw material at home – books, framed photos, vases, small bowls, plants, wooden objects. Start by “shopping” every other room in your house before considering a store trip.
How often should I restyle a bookshelf?
Every 6-12 months, or when it starts feeling stale. Small rotations – swapping in a plant, changing one photo, moving a book stack – are enough. Full overhauls only when your taste or the room changes.
Why does my bookshelf still look bad after styling?
Almost always one of three reasons: too many items overall, no height variance between objects, or zero empty space. Remove 3-5 items, add one tall object per shelf, and leave gaps. That fixes 90% of “still looks bad” cases.
Start Your Bookshelf Styling in 30 Minutes This Weekend
Bookshelf styling isn’t magic. It’s a formula anyone can follow – books, objects, negative space, mixed heights, and a squint test at the end.
You don’t need a designer, a shopping trip, or any special skill. What you need is 30 minutes, an empty floor to sort onto, and the willingness to remove more than you add.
Take everything off your worst-looking shelf right now. Sort into keep/donate/store. Then rebuild using the 3-zone method. Squint from 6 feet away. Adjust once. Done.
Your bookshelf isn’t broken. It’s just waiting for the styling layer.
For a related quick-win decor project, our guide to refreshing your home without buying new furniture (https://localhomeimprove.com/home-decor-ideas-without-buying-new-furniture/) has more low-cost ideas that pair perfectly with a newly styled bookshelf.