
Water damage can quickly turn into a serious problem for any homeowner. One of the biggest risks is mold after water damage, especially when moisture stays trapped in walls, ceilings, floors, or carpets. In many cases, mold can begin growing within 24 to 48 hours, which is why fast action is so important. If you understand the warning signs and take the right steps early, you can reduce damage, protect your health, and avoid expensive repairs.
This guide explains how to identify mold, clean it safely, know when to call a professional, and prevent it from coming back.
How Mold Develops After Water Damage and How to Prevent It
Mold grows when it finds the right conditions. After a leak, flood, burst pipe, or roof problem, your home can become the perfect place for mold to spread.
Mold loves three things:
- Moisture
- Warm temperatures
- Organic materials like wood, drywall, and carpet
Even a small amount of trapped moisture can lead to mold after water damage if the area is not dried quickly and properly.
How Fast Does Mold Grow?
In many cases:
- Mold can start forming in 24 to 48 hours
- Colonies can spread within 3 to 5 days
- Serious infestations can develop in 1 to 2 weeks
That is why quick cleanup is critical.
Signs of Mold After Water Damage
Before you begin cleanup, you need to know whether mold is present. Sometimes it is easy to spot, but in many cases it hides behind walls, under flooring, or in damp corners.
Common Warning Signs of Mold After Water Damage
Watch for these signs:
- Musty or earthy smell
- Dark spots on walls or ceilings
- Peeling paint or bubbling drywall
- Warped wood or flooring
- Increased allergy symptoms indoors
- Visible fuzzy or slimy patches
Hidden Mold Clues
Even if you cannot see it, you may still have a mold problem. Hidden clues include:
- Persistent damp smell
- Past leaks in the same area
- Water stains that keep growing
- Condensation problems
If water sat for more than 24 to 48 hours, the risk becomes much higher.
Step 1: Stop the Water Source Immediately
Before you deal with any cleanup, fix the source of moisture. If the water problem continues, the mold will return no matter how much cleaning you do.
Common Water Sources to Check
Look for problems such as:
- Burst pipes
- Roof leaks
- Appliance leaks
- HVAC condensation
- Basement seepage
- Overflowing toilets or tubs
Take care of the water source first so your cleanup effort is not wasted.
Pro tip: Take photos of the damage before starting cleanup if you may need them for insurance.
Step 2: Dry the Area Completely
Drying is one of the most important steps in preventing further mold growth. Mold cannot keep spreading without moisture.
How to Dry Your Home Fast
Use these methods together:
- Run fans all the time
- Use a dehumidifier
- Open windows if weather allows
- Remove wet materials
- Increase airflow in the room
- Use air conditioning if available
Moisture Targets for Mold Prevention
Aim for indoor humidity below 50 percent. Try to dry the affected area within 24 to 72 hours if possible.
The faster you dry the space, the lower the chance that mold after water damage will spread deeper into your home.
Step 3: Remove Water-Damaged Materials
Some materials can be saved, while others should be removed. Porous items often trap water deep inside and become hard to clean properly.
Materials Often Beyond Repair
You may need to discard:
- Soaked drywall
- Wet insulation
- Moldy carpet padding
- Ceiling tiles
- Pressed wood products
These materials often hold moisture inside, making cleanup much harder.
Materials That Can Often Be Saved
These are usually easier to clean:
- Solid wood
- Metal
- Glass
- Tile
- Hard plastics
If a material feels soft, swollen, or smells musty even after drying, it may need to be removed.
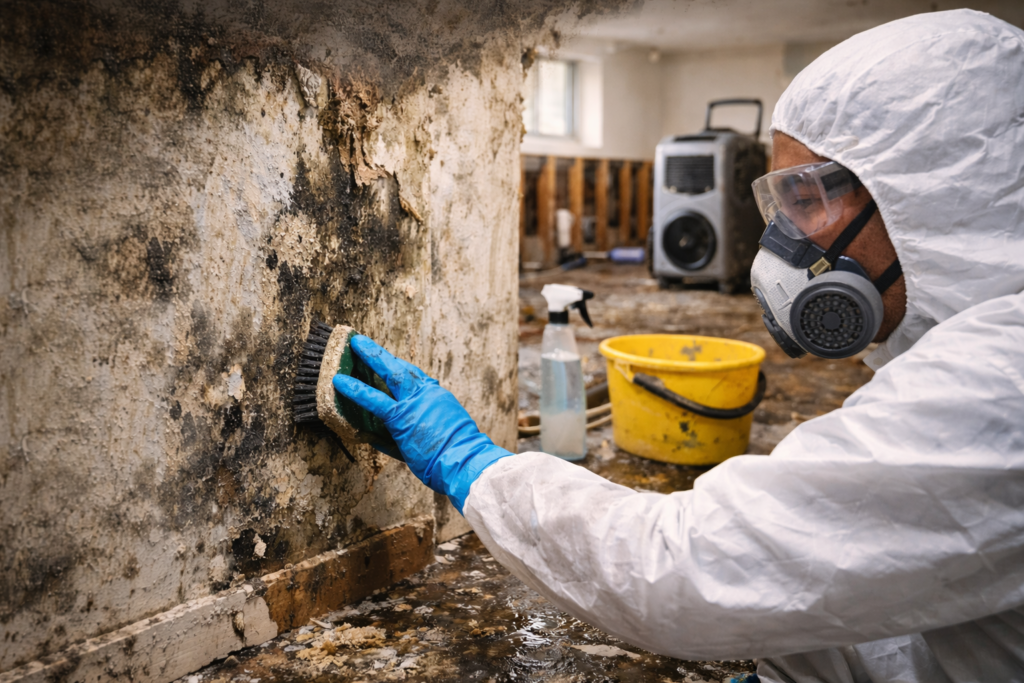
Step 4: Remove Mold from Walls and Surfaces Safely
Now comes the main cleanup stage. Small areas of visible mold are often manageable for homeowners, but larger areas may require professional help.
Safety Gear You Should Wear
Before starting cleanup, use:
- N95 mask or respirator
- Rubber gloves
- Safety goggles
- Long sleeves and pants
This helps protect you from airborne mold spores and cleaning products.
Cleaning Solution Options
You can use:
- White vinegar
- Hydrogen peroxide
- Commercial mold remover
- Mild detergent solution
Do not mix chemicals together.
Step-by-Step Mold Removal Process
Follow these steps carefully:
1. Contain the Area
Close doors and isolate the affected space if possible. This helps reduce the spread of spores.
2. Lightly Dampen the Mold
A light mist can help reduce airborne spores while cleaning. Do not soak the area again.
3. Scrub the Surface
Use a brush or cloth with your chosen cleaning solution on the affected surface.
4. Wipe and Rinse
Remove leftover residue with clean water and disposable cloths.
5. Dry the Area Fully
This final drying step is essential. Any moisture left behind can lead to regrowth.
Step 5: Deal With Black Mold After Water Damage
Many homeowners worry about black mold after water damage. While not all dark mold is toxic, any mold growth should be taken seriously.
When Black Mold Is More Dangerous
Risk becomes higher if:
- The affected area is large
- Mold keeps returning
- Family members have asthma or allergies
- The home has had long-term moisture problems
When to Call Professionals
Consider expert help if:
- Mold covers more than 10 square feet
- Mold is inside HVAC systems
- Mold is behind walls
- The home smells strongly musty
- You had major flooding
Professional teams have proper equipment for containment, air filtration, and safe removal.
Step 6: Disinfect and Deodorize the Area
After visible mold is gone, you still need to deal with odors and any remaining particles in the air.
Effective Deodorizing Methods
- Run air purifiers with HEPA filters
- Use baking soda for odor absorption
- Run a dehumidifier for several days
- Improve room ventilation
- Replace HVAC filters
This step helps make sure the cleanup is more complete.
Step 7: Prevent Mold After Water Damage in the Future
Preventing future problems is one of the best ways to protect your home. Good daily habits and regular maintenance can help stop mold before it starts.
Tips to Help Prevent Mold After Water Damage
- Fix leaks immediately
- Keep indoor humidity below 50 percent
- Use bathroom exhaust fans
- Clean gutters regularly
- Insulate cold pipes
- Check under sinks monthly
- Maintain roof and flashing
- Ensure proper yard drainage
High-Risk Areas to Monitor
Pay close attention to:
- Basements
- Bathrooms
- Kitchens
- Laundry rooms
- Attics
- Around windows
Early detection can save you a lot of money and stress.
Common Mistakes to Avoid
Many homeowners make mistakes that allow mold to spread or return.
Avoid these common errors:
- Painting over mold
- Ignoring small leaks
- Not drying deeply enough
- Using bleach on porous materials
- Skipping protective gear
- Waiting too long to act
Even small mistakes can turn a manageable problem into a much larger one.
When Mold Damage Becomes Serious
Sometimes DIY cleanup is not enough. When mold spreads widely or keeps coming back, the damage may be more serious than it looks.
Warning Signs of Severe Mold Damage
- Mold keeps coming back
- Walls feel soft or crumbly
- Strong musty odor throughout the home
- Large areas of discoloration
- Health symptoms worsen indoors
In these situations, professional cleanup is usually the safest choice.
Cost of Mold Removal After Water Damage
Costs can vary depending on the size of the problem and how quickly it is handled.
Typical Price Ranges
- Small DIY cleanup: $0 to $100
- Minor professional job: $500 to $1,500
- Moderate infestation: $1,500 to $5,000
- Severe whole-home cleanup: $5,000 to $20,000+
Acting early is the best way to keep costs lower.
Frequently Asked Questions About Mold After Water Damage
How quickly should I act after water damage?
Immediately. Mold can begin growing within 24 to 48 hours, so drying and cleanup should start as soon as possible.
Can mold grow even after the area looks dry?
Yes. Hidden moisture inside walls or under flooring can still support mold growth, which is why deep drying matters.
Is bleach the best way to remove mold?
Bleach can work on non-porous surfaces, but it is usually less effective on drywall and wood. Vinegar or commercial mold removers often work better.
Will mold go away on its own?
No. Mold continues to spread as long as moisture is present. You must clean it and fix the source of water.
How do I know if mold is behind my walls?
Warning signs include musty smells, recurring stains, peeling paint, or past water leaks in the area. A moisture meter or professional inspection can help confirm it.
Final Thoughts on Mold After Water Damage
Dealing with water damage quickly is the best way to protect your home. Mold after water damage can spread fast, damage building materials, and create indoor air quality problems if it is ignored. The key steps are simple: stop the water source, dry the area thoroughly, remove badly damaged materials, and clean mold safely.
Small problems are often manageable if caught early, but larger infestations usually need professional help. If you stay proactive and watch for the warning signs, you can keep your home cleaner, safer, and better protected for years to come.